Photography in Norway: Norwegian Vocabulary for Capturing Moments
Photography in Norway has a rich history that dates back to the early 19th century. The first known photograph taken in Norway was captured by Swedish photographer Carl Johan Fahlcrantz in 1840. Since then, photography has become an integral part of Norwegian culture, capturing the country’s stunning natural beauty and diverse landscapes.
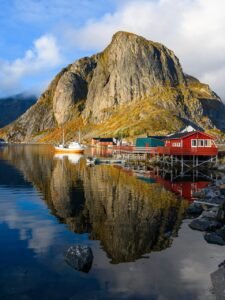
Norway is known for its breathtaking fjords, majestic mountains, and picturesque coastal villages. The country’s landscapes provide endless opportunities for photographers to capture unique and awe-inspiring images. From the rugged peaks of the Lofoten Islands to the serene beauty of the Geirangerfjord, Norway offers a wide range of subjects for photographers to explore.
Table of Contents
ToggleKey Takeaways
- Norway offers stunning landscapes and natural wonders for photography enthusiasts.
- Learning Norwegian photography vocabulary can help you communicate with locals and understand photography terms.
- Basic camera settings like ISO, aperture, and shutter speed are important for capturing moments in Norway.
- Tips for taking landscape photos in Norway include using a tripod, shooting during the golden hour, and incorporating foreground elements.
- Capturing the Northern Lights in Norway requires planning, patience, and the right camera settings.
Understanding Norwegian Vocabulary for Photography
If you’re planning to photograph in Norway, it can be helpful to familiarize yourself with some common photography terms in Norwegian. Here are a few key words and phrases to get you started:
– Kamera (Camera)
– Linse (Lens)
– Blenderåpning (Aperture)
– Lukkertid (Shutter Speed)
– ISO (ISO)
– Eksponering (Exposure)
– Fokus (Focus)
– Bildekvalitet (Image Quality)
– Utskrift (Print)
– Fotograf (Photographer)
Additionally, it can be useful to learn some basic phrases for communicating with locals about photography. Here are a few examples:
– Kan du anbefale et godt fotosted? (Can you recommend a good photo spot?)
– Hva er de beste kamerainnstillingene for dette lyset? (What are the best camera settings for this light?)
– Kan du ta et bilde av meg? (Can you take a picture of me?)
– Hvor kan jeg få bildene mine fremkalt? (Where can I get my photos developed?)
Basic Camera Settings for Capturing Moments in Norway
When photographing in Norway, it’s important to understand how to adjust your camera settings to capture the best possible images. Here are some recommended camera settings for different lighting conditions:
– Daylight: Use a low ISO (around 100-200) for optimal image quality. Set your aperture to a medium value (around f/8-f/11) for a sharp depth of field. Adjust your shutter speed accordingly to achieve a well-exposed image.
– Golden Hour: During the golden hour, the soft, warm light can create stunning images. Use a low ISO and a wide aperture (around f/2.8-f/4) to capture the beautiful colors and soft shadows. Adjust your shutter speed to maintain proper exposure.
– Low Light: In low light conditions, you may need to increase your ISO to capture enough light. However, be mindful of noise in your images. Use a wide aperture and a slower shutter speed to compensate for the lack of light.
It’s also important to understand how aperture, shutter speed, and ISO work together to create a well-exposed image. Adjusting the aperture affects the depth of field, while changing the shutter speed determines how motion is captured. ISO controls the sensitivity of the camera’s sensor to light.
Tips for Taking Landscape Photos in Norway
Norway’s landscapes are truly breathtaking, and capturing them in photographs can be a rewarding experience. Here are some tips for taking stunning landscape photos in Norway:
– Golden Hour: The golden hour, which occurs shortly after sunrise and before sunset, is often considered the best time of day for landscape photography. The soft, warm light during this time can create a magical atmosphere in your images.
– Rule of Thirds: The rule of thirds is a composition technique that involves dividing your frame into nine equal parts using two horizontal and two vertical lines. Place key elements of your landscape along these lines or at their intersections to create a visually pleasing composition.
– Leading Lines: Look for natural lines in the landscape, such as rivers, roads, or paths, that can lead the viewer’s eye into the image. These leading lines can add depth and guide the viewer’s gaze through the photograph.
– Foreground Interest: Including a strong foreground element in your landscape photos can add depth and interest to the image. Look for rocks, flowers, or other objects that can serve as a focal point in the foreground.
– Experiment with Perspectives: Don’t be afraid to get low to the ground or climb to higher vantage points to capture unique perspectives of the landscape. Changing your perspective can add a fresh and interesting element to your images.
Capturing the Northern Lights in Norway: A Guide
One of the most sought-after photography experiences in Norway is capturing the Northern Lights, also known as the Aurora Borealis. Here is a guide to help you photograph this natural phenomenon:
– When and Where: The Northern Lights are most commonly seen in Norway between September and March, with peak activity occurring around the equinoxes in September and March. The best locations for viewing and photographing the Northern Lights in Norway include Tromsø, Lofoten Islands, and Finnmark.
– Camera Settings: To capture the Northern Lights, use a wide-angle lens with a low aperture (around f/2.8-f/4) to let in as much light as possible. Set your ISO to a high value (around 800-1600) to capture the faint light of the Aurora. Use a tripod to keep your camera steady during long exposures.
– Long Exposures: The Northern Lights can be quite faint, so using long exposures (around 10-30 seconds) can help capture more light and detail. Experiment with different exposure times to find the optimal settings for your specific conditions.
– Manual Focus: Autofocus can struggle in low light conditions, so it’s best to switch to manual focus when photographing the Northern Lights. Set your focus to infinity and make small adjustments as needed.
– Patience and Persistence: Capturing the Northern Lights requires patience and persistence. Be prepared to spend several hours outside, as the lights can appear and disappear quickly. Keep an eye on the weather forecast and be ready to head out at a moment’s notice.
Best Locations for Photography in Norway
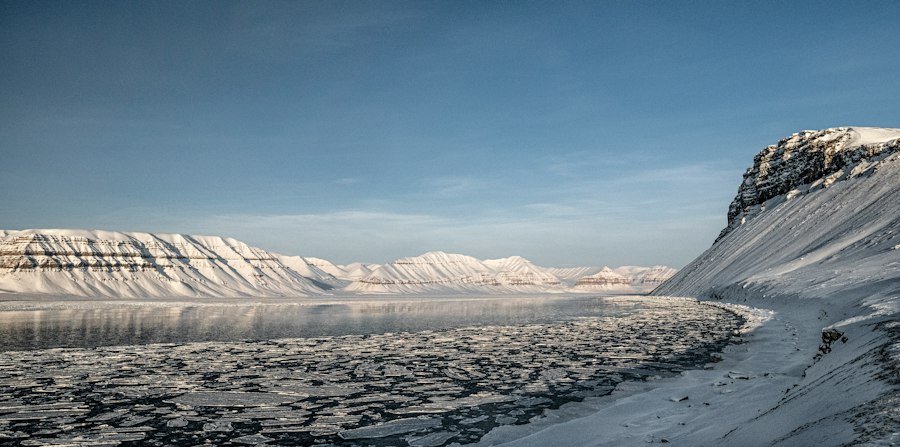
Norway is home to countless photogenic locations, each offering its own unique beauty. Here are some of the best locations for photography in Norway:
– Lofoten Islands: The Lofoten Islands are known for their dramatic landscapes, including towering mountains, pristine beaches, and picturesque fishing villages. The islands offer endless opportunities for landscape photography, particularly during the midnight sun in summer and the Northern Lights in winter.
– Geirangerfjord: The Geirangerfjord is a UNESCO World Heritage site and one of Norway’s most iconic landscapes. The fjord is surrounded by steep mountains, cascading waterfalls, and lush greenery, making it a paradise for photographers.
– Trolltunga: Trolltunga is a famous rock formation that juts out over Lake Ringedalsvatnet. The hike to Trolltunga is challenging but rewarding, offering breathtaking views of the surrounding mountains and fjords.
– Preikestolen: Preikestolen, also known as Pulpit Rock, is a massive cliff that overlooks the Lysefjord. The hike to Preikestolen is relatively easy and offers stunning views of the fjord below.
– Tromsø: Tromsø is one of the best places in Norway to see the Northern Lights. The city itself is also picturesque, with colorful wooden houses and a stunning Arctic landscape.
When exploring these locations, don’t be afraid to venture off the beaten path and discover lesser-known spots for photography. Norway is full of hidden gems waiting to be captured through your lens.
Portrait Photography in Norway: Tips and Tricks
Norwegians are known for their natural beauty and authentic charm, making them excellent subjects for portrait photography. Here are some tips and tricks for capturing authentic and natural portraits of Norwegians:
– Natural Light: When photographing portraits, natural light is often the most flattering. Look for soft, diffused light, such as that found on overcast days or in shaded areas. Avoid harsh midday sunlight, as it can create unflattering shadows.
– Candid Moments: Instead of posing your subjects, try capturing candid moments that showcase their true personalities. Encourage them to engage in activities or conversations that make them feel comfortable and at ease.
– Minimalist Backgrounds: Keep the focus on your subject by choosing minimalist backgrounds that don’t distract from the main subject. Look for clean lines, neutral colors, and simple textures.
– Eye Contact: The eyes are often considered the window to the soul, so make sure to capture your subject’s eyes in sharp focus. Encourage them to make eye contact with the camera to create a connection with the viewer.
– Experiment with Composition: Don’t be afraid to experiment with different compositions and angles when photographing portraits. Try shooting from different heights or using unconventional framing techniques to add interest to your images.
When working with models or subjects in Norway, it’s important to be respectful and considerate of their boundaries. Always ask for permission before taking someone’s photo and be open to their input and suggestions.
Wildlife Photography in Norway: Dos and Don’ts
Norway is home to a diverse range of wildlife, including reindeer, moose, arctic foxes, and seabirds. If you’re interested in photographing wildlife in Norway, here are some dos and don’ts to keep in mind:
– Do Respect Wildlife: When photographing wildlife, it’s important to respect their natural behavior and habitat. Keep a safe distance and avoid disturbing or harassing the animals.
– Don’t Feed or Approach Wildlife: Feeding or approaching wildlife can disrupt their natural behavior and can be harmful to both the animals and yourself. Keep a safe distance and use a telephoto lens to capture close-up shots.
– Do Research Animal Behavior: Before photographing a specific species, take the time to research their behavior and habits. This will help you anticipate their movements and increase your chances of capturing unique and interesting shots.
– Don’t Use Flash: Using flash can startle or disorient wildlife, so it’s best to avoid using it when photographing animals. Instead, rely on natural light or use a high ISO to capture well-exposed images.
– Do Be Patient: Wildlife photography requires patience and persistence. Be prepared to spend long hours waiting for the perfect shot. Use camouflage or blinds to blend into the environment and increase your chances of getting close to the animals.
Remember that wildlife photography should always prioritize the well-being and conservation of the animals. Respect their space and observe from a distance to ensure their safety.
Norwegian Photography Culture and Traditions
Photography is deeply ingrained in Norwegian culture and traditions. Norwegians have a strong appreciation for nature and the outdoors, which is reflected in their photography. The country’s stunning landscapes have inspired countless photographers throughout history, resulting in a rich tradition of nature photography.
Norway also has a strong tradition of documentary photography, with many photographers capturing everyday life in the country. From street scenes in Oslo to rural communities in the north, these photographers provide a glimpse into Norwegian society and culture.
In addition to nature and documentary photography, Norway has a thriving art photography scene. Many Norwegian photographers push the boundaries of traditional photography, experimenting with new techniques and concepts. The country’s art galleries and museums showcase a wide range of photographic works, from abstract compositions to conceptual installations.
Showcase of Norwegian Photographers and Their Work
Norway is home to many talented photographers who have made significant contributions to the field of photography. Here are a few notable Norwegian photographers and examples of their work:
– Morten Krogvold: Morten Krogvold is a renowned Norwegian portrait photographer known for his intimate and emotive portraits. His black and white images capture the essence of his subjects, revealing their inner thoughts and emotions.
– Lise Utne: Lise Utne is a landscape photographer who specializes in capturing the beauty of the Norwegian wilderness. Her images often feature dramatic lighting and vibrant colors, showcasing the raw power and tranquility of nature.
– Andrea Gjestvang: Andrea Gjestvang is a documentary photographer who focuses on social issues and human stories. Her series “One Day in History” won the prestigious World Press Photo award in 2013, capturing the survivors of the 2011 Utøya massacre.
– Dag Alveng: Dag Alveng is a conceptual photographer known for his experimental approach to photography. His work often blurs the line between reality and fiction, challenging viewers’ perceptions of the world around them.
These photographers, along with many others, have had a significant impact on Norwegian photography and continue to inspire future generations of photographers.
In conclusion, photography in Norway is a captivating and rewarding experience. From its rich history to its stunning landscapes, Norway offers endless opportunities for photographers to capture unique and awe-inspiring images. By understanding the country’s photography vocabulary, adjusting camera settings accordingly, and exploring its diverse locations, photographers can create stunning photographs that showcase Norway’s natural beauty and cultural traditions.
If you want to learn Norwegian, you can register for classes here. We look forward to hearing from you and helping you become fluent in Norwegian.
